
Plan Your Adventure: Colorado
Posted by Alex R. on Aug 27th 2015
I recently had the chance to spend eight days climbing mountains and hiking trails all across the great state of Colorado. If you’ve been following the blog at all, you’ve likely seen some trail and city-specific posts about my adventures across the Rocky Mountain State. Rather than waste words and recap those in detail, I wanted to do something else. I wanted to give anyone interested the best possible resource with which to plan their own outdoors pilgrimage to the Mountain West!
This trip report is a little different than the average: I’ll be breaking down my itinerary, my gear, and my recommendations in order to help you plan your own Colorado trip! Without further ado, let’s begin:
Day 1: DTW -> DIA -> Boulder.
Overnight accommodations: hotel in Boulder.
I caught an early flight out of Detroit in order to get ahead of the time change and not burn a full day in transit. Since I was flying out on a Friday morning, I’d have most of a standard weekend day to spend in the greater Denver area before heading out into the mountains west of the city. Southwest flies a frequent 6am flight out of DTW that, assuming smooth sailing both through the air and baggage claim, will have you clear of DIA and on the road around 10am. You well and truly need a rental car out West – it’s not cheap, but you’ll need your own mobility to hit trailheads when you want to. I recommend Enterprise for the service and pricepoint.

Leave DIA and take a straight shot down US Route 36 to Boulder, CO. Any Ann Arborites will feel right at home in this mountain campus town full of farmers markets and outdoor green spaces. Boulder is best experienced as an overnight, and provides a good acclimation point between sea level (cough, Michigan, cough) and any mountain towns. There’s a ton to see and do for all ages in “The Berkeley of the Rockies” – 36 hours barely scratches the surface of all the wonderful city has to offer. Check out our Overnight Guide to Boulder, CO for a full list of places to eat, things to do, and sights to see!
Day 2: Boulder -> Breckenridge.
Overnight accommodations: rental in Breckenridge.
Take advantage of your jet lag and catch an early sunrise over the Flatirons. If you’re following our Overnight Guide to Boulder, CO (highly recommended, of course), you’ll then get out for a morning hike up to the base of the breathtaking sandstone formations so embraced by Boulder residents as a symbol of the city. Not only are the views every bit as stunning as the photos portray, but your first real walk at altitude will help ease you into the thinner air. Return from your morning hike, find breakfast in town (our choice: Laughing Goat Coffee in East Boulder), shower at the hotel, then check out and prepare yourself for the drive into the mountains! Today, you head West, young man.

The drive from Boulder to Breckenridge takes around two hours in light traffic. I got into Breckenridge around 2pm and went straight from the car to a late lunch at local favorite The Motherloaded Tavern. Sit on the back porch and enjoy a beautiful view of the Ten Mile Range, then dive into one of Motherloaded’s famous burgers! After lunch, wander around downtown Breckenridge (“Breck” to the locals) and take in all that Main Street and Ridge Street have to offer. You should be well past check-in time at any lodging in the area, so feel free to also use this time to get settled. I took this afternoon to check out the local outdoors stores (special mentions to Breck Sports and Mountain Outfitters), then make a quick grocery run to City Market to buy food then meal prep for the week ahead! My high school chemistry teacher would be excited to know that rice does indeed boil faster at altitude.
After cooking for the week, I ate dinner at the rental property then went into town to grab coffee and talk to the locals about recommended trails in the area. Downtown Breck rolls up the sidewalks early, but local coffee bar and restaurant The Crown keeps the lights on until 9pm. If you go, try the café mocha! Don’t stay out too late, though – tomorrow’s alarm is on the early side, and you’ll want all your energy for your first acclimation hike at altitude.
Day 3: Easy hiking around Breckenridge (McCullough Gulch Trail and White Falls)
Overnight accommodations: rental in Breckenridge.

Set an early alarm, eat a full breakfast, and drive a few short miles outside of town up Highway 9, take a right onto Blue Lakes Rd, and follow signs to the Quandary Peak Trailhead. Don’t worry – today is not a summit day. Drive past the signs directing traffic to Quandary parking and follow the dirt road for another 2 miles or so until you come to the McCullough Gulch Trailhead. The whole drive should take no longer than twenty minutes from Main Street Breckenridge. Due to its accessibility from downtown Breck, I recommend getting to the Gulch Trailhead by 8am at the absolute latest to ensure good parking and a less crowded trail.
From the parking lot, follow the clearly-marked trail for a little under 3 miles to reach a beautiful alpine lake majestically set into the natural glacial bowl referred to as McCullough Gulch. You’d be remiss, however, to put on the blinders and ignore the many lakes, waterfalls, and diversions that dot the trail between you and your destination – White Falls (marked both by signage and the sound of rushing water) is more than worth the slight detour.

Once at the Gulch, take some time to sit still and relax in nature. You never know what sort of wildlife will show themselves to you once you stay a spell. I found a rock overlooking both the lake and White Falls, enjoyed a breakfast of oats and fruit, then watched a mother moose and her calf splash across the Gulch as I munched and reclined. In my mind, it doesn’t get more perfect than that.
Even with youngsters in tow, McCullough’s Gulch should take no longer than 4 hours round trip, ensuring that you’re off the trail well in advance of any afternoon storms blowing in over the peaks. I made lunch at home, then ventured out into Breckenridge around 3pm to explore the town and grab an afternoon coffee. I visited Cabin Coffee, a local joint that roasts its own beans at altitude and promises a sublime cup of the black and hot to any would-be mountaineers all year long. Then, I visited the local shops and met my parents for an early dinner at Modis, a Main Street restaurant serving up contemporary cuisine and (so I was told) one of the best cocktail menus in town. My pork shoulder tasted every bit as good as it looks below.
Dinner is also a good time to evaluate how your party is adjusting to the altitude: if anyone of your group isn’t feeling too hot after the day’s excursion, this would be a good time for an evening walk (followed by dessert, of course!) to get some more light activity in before trying a 14er on Day 5.
However, if everyone is A-ok with the thin mountain air: turn in after dinner, pack your bag tonight, and set an alarm for 5am at the absolute latest. Your dessert comes tomorrow morning, as you summit the first of many 14,000ft peaks. Tomorrow morning (weather withstanding), you return to Blue Lakes Rd for an entirely different purpose: climbing Quandary Peak.
Day 4: Climbing Quandary Peak (Alternate: Hiking the Vistas along Boreas Pass)
Overnight accommodations: rental in Breckenridge.

Option #1: Climbing Quandary Peak. If you’re hiking planning on hiking Quandary today, set an alarm for 5am at the latest and don’t linger too long in bed. Eat a light breakfast, bring twice as much food and water as you think you’ll need, and drive back to Blue Lakes Rd and the Quandary Peak Trailhead. Disembark the parking lot, follow the marked path up through the forest, and begin your ascent towards 14er Number 1: Quandary Peak.
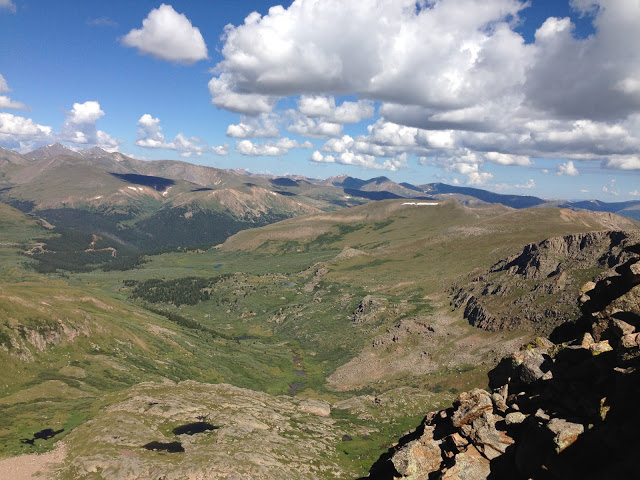
The Quandary Peak trail you’ll be following is a 6.75mi Class 1 hike the entire way. It’s essentially a long, uninterrupted walk uphill. With the right pace and proper preparations, everyone in your party should be able to summit with no issue – it’s just a matter of time. The trail takes you 2 miles out of the parking lot to a rock saddle with beautiful views of the McCullough Gulch area, then up a series of stone steps and scree climbs until you hit a false summit right around 14,000ft. From the false summit, the rest of the trail is as simple as a walk across snowpack and some light granite fields until you hit 14,265ft. Mountain goats are frequent visitors to the summit and are sure to delight any nature lovers among you.

From a 6am trailhead, I was able to summit in a little under 2 hours, leaving plenty of time to enjoy the views before afternoon storms inevitably rolled in. As long as you’re off the summit by 11am with the goal of being back at the parking lot before 1pm, you should be ok. Plan for the forecast you read that morning, however, and above all else, don’t underestimate the mountain. It was an easy climb up, but descending in inclement weather is a whole other story.
Arrive safely back at the trailhead, drive back to your accommodations in Breck, and enjoy a big lunch followed by a well-earned afternoon nap.
Option #2: Hiking the Vistas along Boreas Pass. If you or someone in your party could use an extra day’s time to adjust to the altitude, take today as a second acclimation hike and enjoy a long walk along the scenic Boreas Pass Road overlooking downtown Breckenridge. Don’t be too hard on yourself: at least you can set whatever alarm you’d like. The road winds off the end of Main Street up into the hills above town, directing travelers to either a 3mi or 6mi loop trail, both offering unforgettable views of the Ten Mile Range. 
Follow Boreas Pass Rd until it becomes unmaintained. You should see a small parking area just past the pavement-gravel transition. From that parking area, follow the clearly marked trail off into the woods until you come to a fork. Signs (or friendly locals out walking their dogs) will direct you from this point to your choice of the 3mi or 6mi loop. The best views are along the 3 Mile, but the 6 Mile offers would-be 14er’s the chance to put some extra acclimation work under their legs in preparation for other summits later in the week. Whatever your choice, take in the sights and sounds of the alpine meadows along the trail and enjoy the view! Follow either loop back to the parking lot and return to town for lunch.
Whether you climbed mountains or took in the sights, make sure to spend some more quality time in Downtown Breck. It’d be a shame to miss the many specialty shops lining Main and Ridge streets.
For dinner, try Ember – the bar and happy hour menu are particular hits. A special shout-out to Todd, Ember’s talented and charismatic bartender. He kept my family and I entertained all night with an array of stories that puts Ali Babe to shame.
Day 5: Hiking the Vistas along Boreas Pass (alternate: Climbing Quandary Peak)
Overnight accommodations: rental in Breckenridge.
Weather withstanding, either rest up after yesterday’s ascent with the Boreas Pass Loop Trail from above or utilize that extra day of acclimation to summit your first 14er of the trip and go climb Quandary Peak!

Dinner: Hearthstone Casual Dining. The $35 3-course prix fix menu is a bargain at twice the price. While my lamb shank was unforgettable, watching the sun set over the Ten Mile Range from Hearthstone’s outdoor patio was the real treat of the evening.
Day 6: The Mohawk Lakes Trail and Continental Falls.
Overnight accommodations: rental in Breckenridge.
I’ve linked a full Mohawk Lakes Trip Report here that will tell you what you need to know about this hike in-depth. In general, it’s an easy ascent up some former mining roads to the pristine, glacier-fed Upper and Lower Mohawks. The hike is well worth it for the views alone, and also offers enthusiastic outdoorsmen the chance to go their own way from a trailhead easily managed by any members of the party still adjusting to the altitude or nursing post-14er soreness. For example, I spent most of my time on the trail bouldering up Continental Falls, a magnificent waterfall that borders the marked Class 1 trail.


Save time to snack at Upper Mohawk, take your sweet time descending, and make it back into town around 2pm just in time for an afternoon cappuccino at Cabin Coffee. While at Cabin, I talked to locals and strategized my route for a big summit day tomorrow. On Day 7, I was going to hike – and subsequently see sunrise from – the Quad: four 14,000ft peaks accessible from the same loop trail. Finish your coffee, take in another gorgeous mountain sunset, and pack all your gear.
Dinner: leftovers at the rental. According to my rudimentary planning, I’d need a 4:30am trailhead to summit the first peak of four in time to see sunrise. The trailhead was a 45 minute drive from the rental, and considering I’d need some time to suck down a light breakfast and double check gear… I swallowed my pride and set a 3am alarm. Early to bed, early to rise? I could only hope.
Day 7: Four Peaks in Four Hours along the Kite Lake Trail.
Overnight accommodations: rental in Breckenridge.
Similar to the Mohawk Lakes section of this Guide, I’ve linked a more in-depth trip report to help would-be hikers plan their ownexcursion without boring the rest of you to death in the process. Click through to see my route, the gear I brought with, and tons more pictures!
After getting back into town, I ate a hearty lunch at the rental then accompanied my parents on a “glacial water byproduct” tour of two local institutions who have gained international acclaim for their craft beverages: Breckenridge Distillery and Broken Compass Brewery. The Distillery offers free tours (complete with tastings afterward) while Broken Compass offers, well, some of the best beer you’ll ever taste. Really. Ford, the brewmaster at Broken Compass, is a former R&D chemical engineer who turned his homebrewing passion into his full-time job. You can taste every bit of that deep chemical understanding in each deliciously-fermented drop.
Both Broken Compass and the Distillery are located on the same stretch of Airport Rd right outside of town. A popular pilgrimage for thirsty locals is to visit both in the same afternoon, grab a bite to eat from Broken Compass’ food truck, then spend the afternoon with friends before returning downtown for the evening. I highly recommend it.
For dinner, we returned to the ever-popular Modis before turning in early. Although I was tired and tender from the day’s hike, I was determined to climb a sixth 14er this trip. I had talked to enough locals by this point to nail down the perfect candidate: Mt. Bierstadt, a popular peak with ready trailhead access located in nearby Georgetown, CO.
Day 8: Mt. Bierstadt, Climbing the Sawtooth, and the (Womping) Willows
Overnight accommodations: rental in Breckenridge.
Set a 5am alarm, eat a light pre-hike breakfast, and (as always) double-check your gear to ensure you have more than whatever you’ll expect to need. Then, hop in the car and drive 45 minutes down Highway 9 to nearby Georgetown, CO. Follow Guanella Pass Rd out of town and up through a series of tight switchbacks to elevation. Guanella Pass Rd continues for close to 10 miles before you finally reach the Mt. Bierstadt trailhead and parking lot. Bierstadt is a popular “first 14er” for many in the area, due to its accessible (read: paved) route to the trailhead and its generally shallow summit trek along the mountain’s West Slopes.

The West Slope trail takes you up a mere 2850ft over 3.5 miles from trailhead to summit. For you hardy veterans of Quandary and Kite Lake, summit should take 3 hours at the absolute latest. I recommend an early start mostly to beat stifling summer crowds (as well the routine afternoon storms). To illustrate my point, by complete chance the morning I summited Bierstadt coincided with the Children Hospital Colorado’s annual Climbing for Kids charity hike. An estimated 300 attendees swelled the Class 1 trail past capacity, causing jams in narrow sections and frustration throughout. I was happy to see so many people out enjoying the outdoors in support of such a worthy cause, but ten-deep pileups to cross rocky streams is an experience I’d not soon repeat.

Once at the summit of Mt. Bierstadt, you have two choices: descend the West Slope Trail or make lifelong memories. You can guess which one I chose. Myself and three others decided on a whim to climb “The Sawtooth”, an imposingly steep natural rock formation separating Mt. Bierstadt from the neighboring Mt. Evans, another 14000ft peak just off Guanella Pass.
Crossing the Sawtooth is a dangerous Class 3 hike that should not be attempted without diligent self-assessment and an experienced party. Luckily, I had both. We descended down a granite field from Bierstadt’s summit, traversed a rocky single track up and over a rock saddle onto the Sawtooth proper.


From there on, our party inched along shaky terrain as our boots struggled to dig into the walls of scree that separated us from a 600ft sheer drop mere inches away from trail’s edge. All in all, it took us close to three hours to cross thanks to a close call involving exposure, some loose granite footing and a sharper-than-expected hand hold during a bouldering section.

If my Mom is reading this: everything went perfectly and it only took so long because of frequent snack breaks. Check out these views from the top of a not-dangerous mountain! Love you!

From the top of The Sawtooth, you can either continue along a shallow 1.5mi trail to the summit of the nearby Mt. Evans or descend across an alpine meadow and down through a series of small lakes known as the Willows before eventually rejoining the West Slope Trail close to the Mt. Bierstadt trail head. Our slow going across The Sawtooth meant enough dark clouds had gathered (see: frequent mentions of afternoon storms) by noon that an Evans summit would not have been safe. Another member of the party and I said our goodbyes to the other two and set off across the meadow to descend.

I beat a mad path down the meadow, nearly running out of my Vasque Breeze 2.0’s, when suddenly, the trail became obscured by ankle-deep mud and the once-spacious alpine meadow was replaced by claustrophobic, shoulder height shrubs forming a narrow path. This is The Willows: swampy, solitary, and linear. Unfortunately, the only way out is through. Thankfully, I met another companion on my way through and quickly became acquainted with David, a U of M grad (“Wherever you go, Go Blue”, huh?) from Boulder, CO who, like me, was trying to outrun the inevitable storms and get back to Bierstadt before the skies opened up.
I do not recommend running through calf-deep mud, thorny bushes, and cold alpine streams. But when you feel raindrops shortly after shaking hands with your new trail companion, you do what you have to. Follow the trail through the Willows as it winds, taking the leftmost fork at every opportunity and aiming yourself towards the Bierstadt parking lot that should be visible in the distance. I don’t have any pictures of the Willows (too busy running out of afternoon thunder), but I can only recommend that you wear long pants and take your time to maneuver the nearly limitless mud. Because if you don’t, you end the hike like this:
Return to the parking lot, thank your lucky stars you remembered an extra pair of socks, drive down Guanella Pass Rd back into Georgetown, then jump on the highway back to Breckenridge for a big lunch and a long nap. You earned it.
Dinner: Relish. The buffalo (accompanied by fresh snap peas and “forbidden rice”, a Chinese delicacy) came highly recommended from foodie locals and didn’t disappoint. Take this last night to stop in any stores you may have missed and pick up some local souvenirs, then, get a long night’s sleep. Tomorrow, you leave outdoors paradise and return to reality. I’m sorry, too.
Day 9: Breckenridge -> DIA -> DTW.
Overnight accommodations: your warm bed at home.
Get up early, assemble all your things, grab breakfast in town (the Columbine Café is a local favorite) if you have time, or otherwise, hit the road for the 2 hour drive back to Denver to catch your flight home.
Congratulations! You summited 6 14,000ft peaks, experienced once-in-a-lifetime views, and made the most of every second you spent in both Boulder and Breckenridge, CO.
There’s only one thing left to do: start planning your return.
——————————————————————————————-
Need to get out of Michigan? We don’t blame you – even the hardiest Wolverine needs a break from the Mitten. Read all about our favorite destinations and plan your next trip to places like Chicago (IL), Canyonlands National Park (UT), Boulder (CO), or, click here to go back to the Bivouac Blog!